Monday, April 30, 2012

Fiesta Chicken Crostata with Chile-Lime Yogurt Sauce and a Guest Blogger

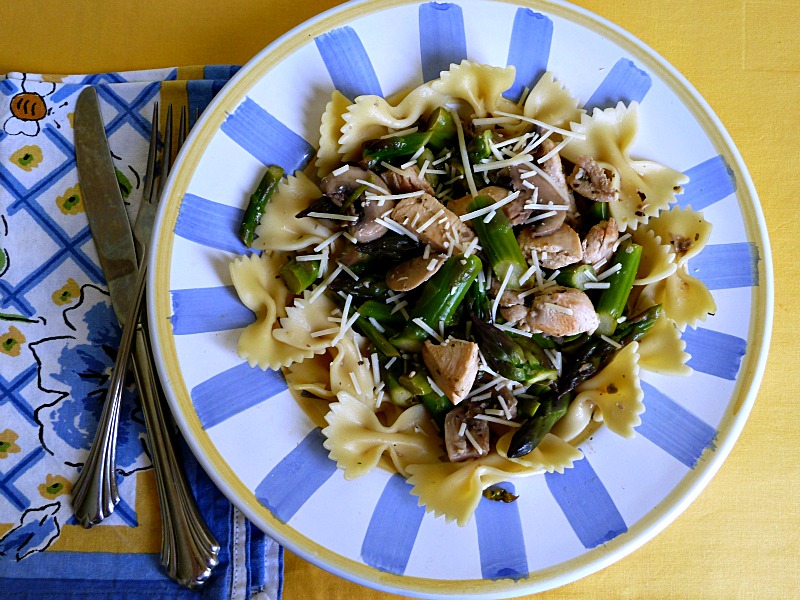
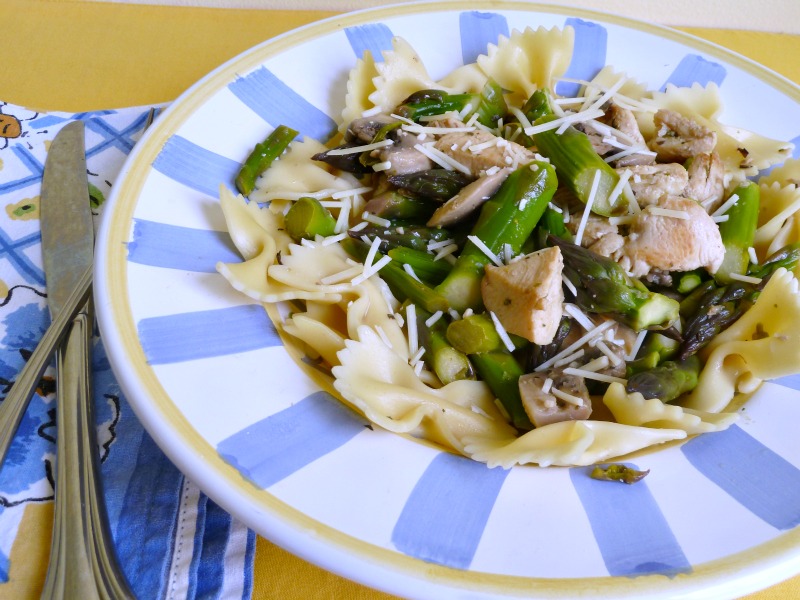
I want to introduce you to another  great blogger friend,Wendy@  The Weekend Gourmet who is taking over my kitchen, due to the passing of my Dad.  Wendy and I have been blogging friends from the beginning. Hers is  a blog with big Texas flavors like the recipe here today, or  Garlic-Herb Goat Cheese-Stuffed Chicken Breasts & Pesto-Tomato Farfalle or her wonderful White Chocolate Strawberry Cake.  If you live in the San Antonio area, you might see the budding TV star on Great Day San Antonio, kens5.com cooking some of her wonderful recipes. You can also follow Wendy on Facebook, and Pinterest.

First off, thank you to my sweet friend Becky for inviting me to guest post for her while she’s away from her blog. I always love reading Becky’s blog, and she’s such a genuinely warm and nice person. I’m glad to be introducing myself and my blog, The Weekend Gourmet, to those of you who don’t already know me!! The recipe I’m sharing today is a tweak on a cooking method I learned while writing a post over Easter weekend. I made Sausage and Egg Crostatas for a Pillsbury Bake-Off spotlight post. The technique was incredibly simple, and I loved how pretty the end result looked...so I knew the basic technique could be adapted to create all sorts of fun recipes. This is my original variation on that theme: Fiesta Chicken Crostata with Chile-Lime Yogurt Sauce.

Using refrigerated French bread dough and roasted chicken breast, you can have this crostata ready to pop in the oven in about 20 minutes. While the crostata bakes, you have time to make a simple yogurt-based dipping sauce to serve on the side. I used my favorite Mexican flavors in this dish: cumin, cilantro, red onion, diced tomatoes with green chiles, colby-jack cheese, and chicken. I find that cutting the crostata into wedges after it comes out of the oven and cools for a few minutes makes it easy to dunk into the creamy sauce. You can serve the crostata wedges with tortilla chips on the side...they’re also really tasty dipped into the chile-lime yogurt sauce!
Fiesta Chicken Crostata
with Chile-Lime Yogurt Sauce
a Weekend Gourmet Original

Step 1:  Preheat oven to 350. Place parchment paper or a silpat on a 15x10 rimmed baking sheet. Remove dough from a package of Pillsbury French bread and carefully unroll it onto the lined pan. Use your fingers to press the dough out to ensure it’s an even thickness all the way around. Combine 1 tbs. dried cilantro, 1 tsp. cumin, 1 tsp. salt, and 1 tsp. onion powder; sprinkle the spices evenly over the bread dough.


Step 2:  Sprinkle the bread dough with 1 cup shredded colby-jack cheese and 1/2 a can of the well-drained tomatoes with green chiles. Note: My preferred brand is Red Gold. Scatter 1/3 cup of thinly slivered purple onion on top of the crostata. Finally, evenly scatter about 1.5 cups of cooked chicken breast over the crostata. You can cook and chop some chicken tenders like I did...or you can just shred one roasted chicken breast from the deli.


Step 3:  Stretch the bread dough about one inch over the top of the ingredients all the way around, pinching and crimping the crostata into an oval as you go. It’s important that the edges stay together, so keep pressing if you need to. Brush the edge of the crostata with olive oil, then sprinkle with garlic salt and black pepper. Bake the crostata for 20 minutes, until golden brown.

Step 4:  While the crostata bakes, make the chile-lime yogurt sauce. Combine the following ingredients in a small bowl: 8 ounces fat-free Greek yogurt (I prefer Chobani), 1 tbs. dried cilantro, the juice of a small lime, 1 tsp. chipotle chile powder, 1 tbs. finely chopped purple onion, and salt and pepper to taste. Stir well to combine and refrigerate until serving. When the crostata comes out of the oven, let it cool for five minutes before slicing. That’s just enough time to pour drinks and put the dipping sauce into individual ramekins.

We really enjoyed the flavor of this crostata...the spicy tomatoes and cheese combo reminded us of a Mexican-style pizza, and the spice sprinkle gave the bread a just a bit of heat. I debated whether to use green onions or slivers of purple onion when developing this recipe, but I was really pleased with the flavor and color of the purple onion. The addition of garlic salt and olive oil to the crust was a good call too: it ensured that every bite of the crostata was flavorful. The only thing I would do differently next time is to use a bit more cheese...maybe 1.5 cups...so it’s a bit more cheesy. Otherwise? This was a perfect weeknight meal...20 minutes prep time and full of flavor!

Thank you Wendy for this wonderful guest post.  I appreciate it very much.  I can't wait to try this flavorful recipe.

Friday, April 27, 2012

Goodbye Dad!

After 16 days in Hospice, my Dad passed away yesterday, peacefully and in no pain. The road was a long one, with many turns. Hospice was wonderful as well as the nursing home staff.  The above picture is the way I will remember Dad at the end.  That picture was on his 92nd birthday in his new NIU red sweatshirt with his beloved McDonald's coffee.

RIP in Dad, and we all love you and miss you, but you had  a wonderful life! Because he was a WII veteran, it is fitting that his memorial service will be Memorial Day weekend!

Wednesday, April 25, 2012

Mediterranean Lamb Stuffed Peppers and Guest Blogger Jessics Hose@ Oh Cake!


Good Morning! While I am taking time off, due to my Father's health, I am having  a couple of wonderful guest bloggers to take over my kitchen. I would like to introduce you to Jessica@Oh Cake!.  I met Jessica when I joined the Love Blog Hop.  She is also the brainchild of The Food Bloggers Network, which is a group where bloggers can focus on professional development and networking . I belong to this group, and have learned a lot.  Besides being a talented writer, Jessica can also bake and cook.  Jessica's Molten Lava Cake with Raspberry Lava and Lamb stuffed phyllo packets are just a few of her sweet and savory offerings. Now, Here is Jessica!

 Hello! I’m Jessica from  Oh Cake! and I’m very pleased to be guest posting for Becky today. Becky has so many wonderful treats on her page (the Irish Cream brownies are one of my favorites!) that it is an honor to be asked to write a post for her blog. It was a struggle, however, to try to decide whether to bake or cook (Becky and I have that in common…) and so in the end I decided to do a savory baked dish: Mediterranean Lamb Stuffed Peppers.


Stuffed peppers are a truly international dish. Whether they are stuffed with fresh cheese and batter fried as in Mexico, or stuffed with potatoes seasoned with tantalizing spices such as in India, you can be sure that wherever peppers are grown someone is stuffing them and serving them as a meal. For my version I like to take my inspiration from the Mediterranean, and Greece in particular, by using lamb, Kalamata olives and feta cheese.

My husband Thom and I love lamb but unfortunately it’s rather expensive. By using ground lamb we get the full flavor of rich, savory lamb without the specialty butcher price tag. The filling for the peppers may be made a day or even two days ahead of time which will allow the flavors to marry and develop before baking and serving.

Mediterranean Lamb Stuffed Peppers ~ serves 4
4 large sweet red or green peppers
1/2lb ground lamb
1/2 cup brown rice, dry
1 cup frozen spinach, thawed & drained
1 cup onion, finely diced
1/4 cup Kalamata olives, pitted and chopped
1/2 cup feta cheese, crumbled
1 teaspoon oregano
2 cloves garlic, minced
1 tablespoon olive oil
salt & pepper to taste

Cook rice according to directions and set aside.

Heat a large skillet over medium heat. Add olive oil and warm through. Add minced onion and sauté until translucent. Add lamb and begin to brown. Add spinach, oregano and garlic. Cook lamb thoroughly.

Remove from heat and stir in cooked rice, olives and feta cheese. Combine well and adjust salt & pepper to taste. Set aside to prep peppers or store in refrigerator overnight.

Preheat oven to 400º F.

To prep the peppers slice the top off as thinly as possible, like this:


Take a paring knife and run it around the inside of the pepper to remove the core and seeds. Reserve tops of peppers but discard the seeds.

Pack pepper three-quarters full of filling and set in a roasting pan. In order to keep the filling inside the pepper during cooking I crumple up a piece of aluminum foil and rest the pepper on it at an angle. This helps to keep the filling from falling out as the pepper softens during cooking. 


Bake 30-40 minutes or until peppers are soft. You may wish to gently rotate the peppers halfway through cooking to ensure even cooking on all sides. You can gently life the peppers with tongs to do this.

I like to serve my peppers with a Greek inspired side salad. I finely chop the reserved pepper tops and combine with lettuce, cucumber, feta and olives to serve alongside the finished peppers. Add some baklava for dessert and you’ll really feel like you brought a little piece of Greece home with you!


Enjoy! You can follow  Jessica on Oh Cake!, Facebook or Pinterest!

Monday, April 23, 2012

Strawberry Spinach Salad


So many strawberry recipes, so little time... until #berrylove ends. If you don't know by now, strawberries are my favorite fruit. I would be remiss, if I didn't add my favorite salad. Strawberry Spinach Salad to #berrylove. Everybody has their own take, and I have mine.


This salad is gorgeous in presentation,with dark green Baby Spinach and red, ripe strawberries, dried cranberries,and chopped walnuts, drizzled with a Balsamic or Raspberry Vinaigrette.  I am Lactose intolerant, so feel free to add crumbled Feta or Parmesan cheese as well.  Pure heaven !  So when strawberries are in season, this is my go to salad. Enjoy

Strawberry Spinach Salad
1 bag of Baby Spinach
1 lb. of fresh strawberries, washed, hulled, and sliced
3/4 c dried cranberries
3/4 c chopped walnuts
Feta or Parmesan cheese (optional)

Balsamic Vinaigrette
1/4 c Balsamic or Raspberry vinegar
2 Tbsp sugar
1/3 c extra virgin olive oil

Whisk vinegar and sugar together,  Gradually stream in olive oil , and whisk to combine.


Arrange greens in salad bowl. Top with rest of salad ingredients.  Chill till serving time.
Drizzle with vinaigrette,  Toss to serve.

I received these beautiful Macarons from my dear friend Gina, on Saturday.  She made these for me to cheer me up and send hugs. For those of you that don't know, my 92 yr. old dad is in Hospice.  Good news, Gina, the cookies worked. I had a big smile  on my face, as I opened the box, and we could hardly wait to eat, one or three:)  Thank you so much, Gina. Hope that you are feeling better.  Be on the lookout for a box for you. For some of us, baking and cooking are therapy.


Friday, April 20, 2012

Chicken, Aspargus and Mushrooms with Lemon over Farfalle


I just love fresh Asparagus in the Springtime. This asparagus was grown about 20 miles from my house.  My brother's mother-in-law grew it her garden, and gave it to us. Because of our record breaking temps in March, we get to eat fresh Asparagus, grown locally in April. The last Asparagus we had a couple of weeks ago was grown in Peru, the country, which had no flavor.  I really try not to buy produce not grown in the USA, except for avocados and limes, which I can never find grown in the USA.  Maybe I need to trek to Whole Foods, which is over an hour away!

 For some reason, I love fresh Asparagus paired with pasta.  Throw in a little chicken, mushrooms (optional), garlic, and herbs, add a lemon juice and you have dinner. The asparagus was wonderful , crunchy and full of flavor, especially with the lemon juice.  Find your self some fresh locally grown Asparagus and make this wonderful dish of Springtime flavors. Enjoy!

Chicken, Asparagus and Mushrooms with Lemon over Farfalle

Ingredients

1Tbsp butter or Smart Balance (I used Smart Balance)
1Tbsp olive oil
8 oz, chicken breasts, diced.
2 large cloves of garlic, thinly sliced
8 oz, sliced mushrooms
1/2 c white wine
1lb of fresh asparagus, cleaned, cut in 2 in. pieces
1 tsp of oregano
1 lemon, juiced
 Farfalle, cooked to al dente
Grated Parmesan cheese

Directions:

Heat frying pan to med-high heat.  Add butter and olive oil, saute chicken until thoroughly cooked and lightly brown, 5-7 minutes. .Remove from pan.

 Saute garlic for 2 minutes. Add a little more oil to pan, if needed. Add cleaned, cut asparagus, sliced mushrooms, wine, and oregano, saute for about 5 min, until it turns a darker green, till crunchy.  Return cooked chicken to pan. Add lemon juice and heat through about 1-2 min. Serve over cooked Farfalle, and top with grated Parmesan cheese.

l linked up my recipe to Brandie@The Country Cook's Weekend Potluck#14
Stop by and say Hi to Brandie!

Wednesday, April 18, 2012

Savory Chicken with Bell Peppers and Mushrooms

I got this recipe from my friend,  Joanna, when were over at her home for dinner with her and her husband, Tony. The chicken was so moist and tender, pounded thin, and sauteed. with all of those wonderful veggies, green  and red bell peppers, mushrooms,onions, and herbs. Then, you make pan sauce with chicken stock, white wine, garlic, oregano, and balsamic vinegar, thickened with a little cornstarch. Pour vegetables and sauce over chicken.  You can serve this with rice, pasta, or, noodles.  This is a great, flavorful recipe with vegetables, which cooks quickly, if you pound the chicken breasts thin. I didn't pound my chicken breasts thin, as you can see in the picture. I made this for my brother, who is here until tomorrow.  Enjoy!


Savory Chicken with Bell Pepper and Mushrooms   From Joanna

Ingredients:
4 boneless, skinless chicken breast halves
vegetable oil spray
1 tsp. vegetable oil (I used olive oil)
1 medium onion, thinly sliced
4 cloves garlic, thinly sliced
8 oz. sliced fresh mushrooms  I used Baby Bella
1 medium red bell pepper, thinly sliced
1 medium green bell pepper, thinly sliced
1 cup low sodium chicken broth
1/2 cup white wine
1 Tablespoon balsamic vinegar
1/2 tsp. dried oregano, crumbled
1 Tbsp. cornstarch
1/4 cold water


Put the breasts with the smooth side up between 2 sheets of plastic wrap. Using a meat mallet or rolling pin, lightly flatten the breasts to 1/4 inch thickness, being careful not to tear the meat.( I didn’t do this step, but just cooked regular chicken breasts, which lengthens the cooking time.)

Heat a large nonstick skillet over medium-high heat. Remove from heat and lightly spray with vegetable oil. Cook the chicken 4-6 minutes, or until lightly golden brown, turning once. Transfer to a plate.

Reduce the heat to medium. Pour the oil into the skillet and swirl to coat the bottom. Cook the onion and garlic until light golden brown, 5-6 minutes, stirring constantly. Stir in the mushrooms and bell pepper. Cook for 2-3 minutes, or until the veggies are tender, stirring occasionally. Reduce heat to medium-low.

 Add in chicken breasts, Stir in the chicken, broth, wine, vinegar, oregano and pepper. Cook for 10 minutes or until the chicken is no longer pink. Transfer the chicken to a platter. Cover with aluminum foil to keep warm.

Put the cornstarch in a small bowl. Add the water, stirring to dissolve. Stir the liquid mixture into the skillet. Cook 1-2 minutes, or until the mixture is thickened, stirring occasionally.

To serve, pour the vegetables and sauce over the chicken. Serves 4.  Enjoy!


Monday, April 16, 2012

Applesauce Brownies


I have had  a lot going on this weekend.  My nieces came out from Chicago to see their Grandpa, my brother is here from Colorado, until Thursday, and my other brother came from Chicago to see our Dad yesterday.. We had a mini family reunion of sorts.  My Dad in is a nursing home about 25 miles from me, so I have been back and forth a lot in the last few days.

 My brother from Chicago is in remission from Leukemia,and had a heart attack, almost a year ago.  I knew that I just wanted to whip up some brownies for the chocolate lover, but they had to be healthy. I have made baked goods with applesauce before, but it has been awhile.  I found this recipe for Applesauce Brownies on Jessie @ The Messie Kitchen. These brownies are almost vegan, if it weren't for the half cup of mini chocolate chips. They are egg free, oi free,  low sugar, and I used unsweetened applesauce. I did use AP flour though, because I keep my whole wheat flour in the freezer, and I didn't have time for the Whole wheat flour to come to room temp. You can whip these babies up and bake them, in the less than 30 minutes. There are very few dishes to wash, Christiane:)


These brownies are so moist and chocolatey, but not overly sweet.  Everybody loved them, and I will be making these again. If you don't want them so healthy, you can add a nice chocolate glaze, or a bit of powdered sugar.  Maybe next time I will use some chopped dark chocolate, instead of the mini chocolate chips, or natural peanut butter would be good.  The possibilities are endless, enjoy!


Applesauce Brownies Adapted from TheMessie Kitchen

Ingredients:
1 cup unsweetened applesauce
1/2 cup sugar
1 teaspoon vanilla
1/4 cup unbleached white flour
1/2 cup whole wheat flour
1/2 cup cocoa powder
2 teaspoons baking powder
1/2 teaspoon baking soda
1/2 teaspoon salt
 1/2 Cinnamon
1/2 cup mini chocolate chips

Directions:
1.Preheat oven to 350 and lightly spray or oil an 8 x 8 baking pan.
2. Mix applesauce, sugar, and vanilla in a medium bowl. In another bowl, whisk flour, cocoa, baking powder, baking soda, and salt and pinch of cinnamon together.
3. Make a well in the center of the dry ingredients and add the applesauce mixture. Mix until just combined. Gently fold in chocolate chips
4. Spread in prepared pan and pour caramel sauce over top. Bake 25-30 min, until center is firm and not sticky. Cool completely before slicing

Friday, April 13, 2012

Pork Tenderloin Medallions in Red Wine Sauce with Mushrooms

First of all I want to thank all of my blogger friends for the outpouring of concern, prayers, and friendship that I have received in the past few days for my Dad and my family. I will be forever grateful for your friendship and support.  My husband and I have decided to postpone our trip to Florida for the time being. The timing just wasn't right for the present circumstances. He could be in Hospice for awhile, so I will be in and out for awhile on my blog.

I just revamped this recipe and the pictures from an old post,shortly after I started on Foodbuzz.  This is one of my all time favorite recipes, which is so flavorful, and easy to prepare. Scott made this for my birthday dinner at home this year.  This is definitely fit for company with the wine sauce and mushrooms with the pork medallions.  We serve it over wide noodles, but you could also serve it over rice or pasta. The flavors in the dish wafting through your kitchen, while this cooks, are amazing

I got this recipe from my dear friend, Pam, who passed away from a brain tumor in 2003. She had two girls, who are married and have families of their own, and I stay in touch with them.  Every time I make this recipe I say "Thank You, Pam". I hope that you enjoy this recipe as much as we do.

Ingredients  You can vary this recipe, depending on how much pork tenderloin you use, and adjust accordingly.

1.1-lb. pork tenderloin
2.1 lb. of mushrooms, any type-we used Baby Bella
3. 2 medium yellow onions, sliced
4. 2 cloves of garlic, chopped
5. 1-2 c. red wine, any kind, we used a Chianti
6. 1-2 tsp Herbs De Provence- This wasn't in the original recipe-we added it.
7. Flour for dredging


Directions
1. Slice pork in 1/2" medallions. Dredge in flour seasoned with pepper and a pinch of salt, more if you like it.
2. Brown medallions in olive oil, until lightly browned.  Remove from pan and cover with foil to keep warm.
3. Saute sliced onions and garlic in olive oil until onions are soft.
4. Add sliced mushrooms to onions and cook, until mushrooms are browned.
5.Return the medallions to onions and mushrooms in the pan.  Stir in the Herbs De Provence and red wine, cover until the medallions are cooked through, and the sauce is thickened.
 6.   Serve over noodles, pasta or rice.  Smell, Taste, and Enjoy the flavors of this dish!

 I linked up my recipe to Brandie@The Country Cook's Weekend Potluck#13
Stop by and say Hi to Brandie!

Wednesday, April 11, 2012

Tears on my Keyboard

My Dad is 92 years old and has been in a nursing home for 6 years. He has received wonderful care, and has been content. All the staff loves him, because he had such a good demeanor. Yesterday, I had to put him in Hospice, because of end stage Dementia. He has been going down hill gradually, but in the last three weeks, there has been a drastic decline.  He is no longer eating or talking and his body is shutting down. They will be giving him comfort care. Now, our whole vacation is up in the air.  Hospice will be doing a thorough evaluation, and then we will make our decision about our vacation.

Please say a prayer for my Dad and our family.

Monday, April 9, 2012

Jamaican Lime Banana Bread Muffins


We will soon be going on a road trip on our vacation to Florida.  That means lots of snacks in the car, because I'm always hungry in the car. When I saw Claudia @Whatscookinitalianstylecuisne's  Tropical Banana Coconut Blueberry Bread, I thought that would be good to make for the trip.  Then, I remember seeing  Jamaican Lime Banana Bread  on Liv Life. The bread has bananas, coconut, lime juice and rum, yum! When the bread is warm out of the oven, you pour a glaze of butter, rum, lime juice, coconut, and walnuts I decided to make the banana bread into muffins for easier travel. Bread or muffins, they are are wonderful. These muffins smell amazing with rum glaze coconut ,and lime juice, almost like a Banana Colada in a muffin. I had enough batter, to make a few mini muffins, too. So I ate a mini muffin, and it was out of this world so good. These muffins are now in the freezer awaiting our road trip. Enjoy!


Jamaican Lime Banana Bread Muffins

Cooking spray
2 tablespoons butter, softened
2 tablespoons tub light cream cheese, softened (I've also used part-skim ricotta)
1 cup sugar 

1 large egg
2 cups all-purpose flour
2 teaspoons baking powder
1/2 teaspoon baking soda 
1/8 teaspoon salt
1 cup mashed ripe banana 
1/2 cup skim milk
2 tablespoons dark rum or 1/4 teaspoon imitation rum extract
1/2 teaspoon grated lime rind 
2 teaspoons lime juice
1 teaspoon vanilla extract
1/4 cup chopped pecans, toasted (I used toasted walnuts)
1/4 cup flaked sweetened coconut 

Glaze
1/4 cup packed brown sugar
2 teaspoons margarine, or butter
2 1/2 teaspoons lime juice
2 1/2 teaspoons dark rum or 1/8 teaspoon imitation rum extract
1/2 tsp lime zest
2 tablespoons chopped pecans, toasted
3 tablespoons flaked sweetened coconut 

Preheat oven to 375°. Coat an 8 x 4-inch loaf pan with cooking spray; or muffin tins; set aside.

Beat 2 tablespoons margarine and cheese at medium speed of a mixer; add 1 cup sugar, beating well. Add egg; beat well.

Combine flour, baking powder, baking soda, and salt; stir well. Combine banana and next 5 ingredients (banana through vanilla); stir well. Add flour mixture to creamed mixture alternately with banana mixture, beginning and ending with flour mixture; mix after each addition. Stir in 1/4 cup pecans and 1/4 cup coconut.

Pour batter into prepared pan; bake at 375° for 50 to 60 minutes or until toothpick inserted in center comes out clean. Let cool in pan 10 minutes; remove from pan. Let cool slightly on a wire rack.

Combine brown sugar and 2 teaspoons each margarine or butter, lime juice, and rum in a saucepan; bring to a simmer. Cook 1 minute; stir constantly. Remove from heat. Stir in 2 tablespoons each pecans or walnuts and coconut; spoon over loaf.

I linked up my recipe to Brandie@The Country Cook's Weekend Potluck#13
Stop by and say Hi to Brandie!


Saturday, April 7, 2012

Vanilla Cake Pops, My Favorite Bouquet and Bird Nests


I made Vanilla Cake Pops yesterday with pink candy coating for Easter.  Lets just say that I don't see all the hype about the cake balls.  To me they are to sweet, but they do look cute, and are the latest thing thanks to Bakerella. I bought all of requisite materials; candy sticks, candy melts, and Springtime sprinkles.  The sprinkles were the best part.  I made a Vanilla Cake from King Arthur Flour, which was wonderful, but only used half, because I only made 12 pops. I made my usual Vanilla butter cream Frosting. From there I followed   the tutorial at  52 Kitchen Adventures.   I kept the candy melts warm over a double boiler, and I did use the colander to hold the pops, while drying.  The  jury is out, until tomorrow, when I take them to Anna and Emma, so I'll let you know.

I saw these cute little bird nests on Pinterest @The Curvy Carrot   . They are so cute, and I'm going to use them as place card holders.  These bird nests are easy to make with Chow Mein noodles, semi sweet chocolate chips, butterscotch, chips and peanut butter.  They are perfect for Easter, or any Spring party or project, and fun to make with kids.

Here is Bailey, the Easter Dog, wishing all of my blogger friends, Hoppy Easter!!! I just couldn't get her to wear those bunny ears!  If she looks a little different, it's because she finally went to the groomer.

Thursday, April 5, 2012

Strawberry Bruschetta

I have just recently joined Pinterest two weeks ago, and I am already hooked. I held off as long as I could, but I finally took the plunge.  You know that I love strawberries, if you read my blog.  This Strawberry Bruschetta was the first thing that I saw on Pinterest, and the first thing that I re-pinned. Are you pinning yet?  (You have to get vocabulary down first).  It was love at first sight:)  I never thought of using fruit on Bruschetta before,  veggies, yes, but never my my beloved strawberries.  This appetizer is craazy good, with the strawberries, basil, soft cheese or Feta, and balsamic vinegar on a French Baguette. Strawberry Bruschetta is a  light, wonderful appetizer for,Brunch, or light lunch, perfect for the Spring and Summer parties. I didn't toast my bread, but my hubby toasted his.  If you were making these babies ahead of time, I would lightly toast toast the bread, so it didn't get soggy.  I want to wish all of my Christian friends a Happy Easter Weekend.  Enjoy!


As a side note, we here in  the Chicago burbs, had all of the glorious 80 degree temps for for two weeks, and loved every minute of them. The weather has now shifted, and we have temps in the low 50's, but at least we don't have the "S" word, snow.  Of course, today is opening day for the Chicgo Cubs, and  sadly, I will not be there. It is so difficult to get tickets for opening Day.  I will be watching on TV, though. And then  it is also Easter weekend with temps in the 60's.


Strawberry Bruschetta   Adapted from annie-eats and The Curvy Carrot

Ingredients:
1 cup strawberries, hulled and diced
1 tbsp. sugar
1 French baguette, sliced
4 oz. goat cheese, like Boursin, or cream cheese (I used light cream cheese)
2 oz. Feta cheese, if you use cream cheese
1 tbsp. olive oil
2 tsp. balsamic vinegar
¼ cup basil leaves, chiffonade
Freshly ground black pepper (I didn’t add)

Directions:
1.      Combine the strawberries and sugar in a small bowl; toss to combine.  Let the berries sit for about 30 to release their juices.
2.       Spread a thin layer of goat cheese, or cream cheese on top of each baguette slice.
3.      Top each slice with spoonfuls of the strawberry mixture.  Drizzle lightly with olive oil and balsamic vinegar.
4.      Sprinkle Feta cheese over the strawberry balsamic mixture.  Top each slice with the basil leaves and cracked pepper, to taste. (optional) 

Tuesday, April 3, 2012

Spinach Artichoke Crostini


I made these delightful appetizers to take to a friend's for dinner.  They are very good with toasted baguette, herb cream cheese or Boursin,, Baby spinach, and Baby Artichokes on top.  They have all of the flavors and colors of Spring in one bite, fresh Spinach and artichokes, and lemon, with fresh herbs. If you are looking for a different appetizer for your holiday dinner, these would be perfect. They are like inside out Spinach Artichoke dip with fewer calories. I used Baby artichokes, which I cleaned and steamed and then combined with olive oil and herbs.


These Baby Artichokes are so cute, but there is a certain way to clean and cook them. After rinsing the chokes,  snap off the lower petals, until you reach the yellow-green core.  Use a knife to  cut off one-half in of the top.of the Baby Artichoke. Trim the stems and all remaining dark green areas from the base. Now you can slice, halve, or quarter, depending on what is needed for your recipes. Once the chokes are cut, soak in lemon or vinegar water to keep from browning. Here is a link to everything that you wanted to know about Baby Artichokes,  Preparation of Baby Artichokes. Steaming is the preferred way of cooking, either in a steamer or in the microwave. You may also used the canned artichoke hearts or the marinated ones in a jar, if you don't have fresh ones.


Spinach Artichoke Crostini
·         12 baby artichokes, cleaned and cooked, chopped
·         3 tablespoons extra virgin olive oil
·         1 small clove garlic, finely chopped or grated
·         1/4 cup chopped fresh herbs or whatever fresh herbs you like, such as basil, flat leaf parsley, oregano, etc.
·         Salt and ground black pepper
·         12 thin slices of French bread
·         1 block herb soft cheese (5 ounces), such as Boursin brand,  I used light cream cheese
·         1 cup spinach washed and torn in small pieces I used Baby spinach
Preparation
Pre-heat the oven to 400ºF.

In a medium size mixing bowl, toss together the artichokes, 2 tablespoons olive oil, garlic, herbs, zest and juice of one lemon, and some salt and pepper. Set aside.

Arrange the bread slices on a baking sheet and brush lightly with the remaining tablespoon of EVOO. Pop the bread into the oven and toast until golden brown, about 5 minutes. Let cool.

Herb Cream Cheese
1- 8 oz block light cream cheese softened
1-clove garlic-grated
1-lemon juice and zest.
1-Tbsp fresh herbs, chopped or dried; thyme, flat leaf parsley, or herbs of your choice. 

Combine all ingredients in small bowl and mix well. You can make this spread ahead of time for flavors to blend.

Spread some soft cheese over each slice of toasted bread.  Lay torn pieces of spinach over top of cheese, sort of like a jigsaw puzzle.  Top with a spoonful of the marinated artichokes, a small dollop of cheese, and garnish with lemon zest and serve.

Sunday, April 1, 2012

#Berrylove: Strawberry Strawberry Cupcakes


April is #berrylove month!   Please join in on the #berrylove fun by linking up any berry recipe from the month of April 2012. Don't forget to link back to this post, so that your readers know to come stop by the #berrylove event! The twitter hashtag is #berrylove :). Here  is the The Pinterest Board for #berrylove. Thank you Junia, for hosting the blog hop, and all of your hard work!

When I found out the theme for the April  blog hop was #berrylove, I knew exactly what I wanted to make, Strawberry Cupcakes with Strawberry Butter Cream frosting.  I actually made these in Mid-March, before the Strawberry Lemonade Cupcakes.  You see for me, Strawberries are comfort food.  Each bite of strawberry that I take transports me back to my chilhood, when I would spend time at my Grandma's in Southern Illinois during the summer.  She would let me have Strawberries morning, noon, and night, with her wonderful Pound Cake. Sadly, I don't have that recipe, but I will have to try to make Pound Cake soon. If you have a wonderful Pound Cake recipe, please email it to me.


I looked at many Strawberry Cupcake recipes, finally settling on a white cupcake, chocked full of chopped strawberries, and topped with a wonderful Strawberry Butter Cream Frosting made with Strawberry puree. These cupcakes taste heavenly, and there is a huge strawberry flavor in every bite, from both the cupcake and the frosting. The cake is light and moist and the frosting is wonderful, a perfect combination of flavors and textures.
Strawberry Cupcakes Adapted from Crazy About Cupcakes by Krystina Castella

Ingredients: Makes 12 cupcakes

1/2 cup unsalted butter, at room temperature
1 cup granulated sugar
2 large eggs, at room temperature
1 1/2 cups all-purpose flour
1  teaspoon baking powder
1/2 teaspoon salt
1/3 cup of milk
1 tsp vanilla extract
1 1/2 cups fresh strawberries, sliced
Directions:
1. Preheat the oven to 350°F. Line cupcake pans with liners.

2. With an electric mixer on medium speed beat the butter until soft, about 2 minutes. Add the sugar and beat until light and fluffy, about 3 minutes. Add the eggs, one at a time, beating after each addition. 
3. In a separate bowl combine the flour, baking powder, and salt.

4. With the mixer on low speed, alternately add the flour mixture and milk until combined. Fold in Vanilla and strawberries.

5. Fill the cupcake liners one half to three-quarters full. Bake for about 20-25minutes or until a toothpick inserted in the center of a cupcake comes out clean. Cool cupcakes in the pan. Remove to rack to cool completely.  Frost when completely cool.

Strawberry Butter Cream Frosting
1 sticks unsalted butter, room temperature
2 cups confectioner’s sugar
3 Tbsp strawberry puree (from about 3-4 strawberries)

Directions
1.      In bowl of stand mixer cream butter for 1-2 minutes.
2.      Gradually add confectioner’s sugar and continue mixing scraping down sides of bowl as needed.
3.      Mix in strawberry puree.
4.      Place the frosting in a piping bag fitted with tip 1M to decorate cupcakes.

Here are  my amazing co-hosts:.


A little bit of everything ~ Roxana GreenGirl ~ @RoxanaGreenGirl
Baker Street
~ Anuradha ~ @bakerstreet29
Baking and Cooking, A Tale of Two Loves
~ Becky Higgins
BigFatBaker
~ Erin Meyer ~ @bigfatbaker
Bon à croquer
~ Valerie ~ @valouth
Cake Duchess
~ Lora ~ @cakeduchess
Easily Good Eats
~ Three Cookies                                          
Elephant Eats
~ Amy
Georgie CakesGeorgie @ GeorgieCakes
Hobby And More
~ Richa ~ @betit19
Java Cupcake
~ Betsy Eves ~ @JavaCupcake
Mis Pensamientos
~ Junia ~ @juniakk
No One Likes Crumbley Cookies
~ T.R. ~ @TRCrumbley
Oh Cake
~ Jessica ~ @jesshose
Queen's Notebook
~ Elizabeth  Quirino ~ @Mango_Queen
Rico sin Azúcar
~ Helena ~ @ricosinazucar
Simply Reem
~  Reem ~ @Simplyreem
Soni's Food for Thought
~ Soni ~ @sonisfood
Teaspoon of Spice
~ Deanna Segrave-Daly ~ @tspbasil
That Skinny Chick Can Bake!!!
~ Liz ~ @thatskinnychick
The Art of Cooking Real Food
~ Laura ~ @TAofCRF
The Wimpy Vegetarian
~ Susan ~ @wimpyvegetarian
Vegan Yack Attack
~ Jackie S. ~ @veganyackattack
Vegetarian Mamma
~ Cindy ~ @vegetarianmamma


This is a blog hop!

Print friendly